Apache is a HTTP web server that we can use to host both static and dynamic web pages from our VM. For out purposes we can use it to provide a super efficient way to run commands, and anything, on the VM without scammers knowing.
If you only need to run simple scripts it might be better to run them directly using SSH.
This guide also assumed you have the Scoop package manager installed, as we’ll use that to install everything.
Before setting this up be aware that it is not a secure configuration, we’re deliberately creating something that allows remote users to execute code on our VM. In other words, make sure your VM is on a isolated or trusted network before doing anything.
Installing
All of the commands here can be entered in to the Windows Terminal app or a powershell session via SSH.
First enable the php bucket for any extra extensions or other versions we might need
scoop bucket add php
Install Apache and PHP
scoop install apache php
We need to add Windows Firewall rules to allow connections from the outside world to Apache, the simplest way to do that is just try running it and allow the prompt that appears.
httpd
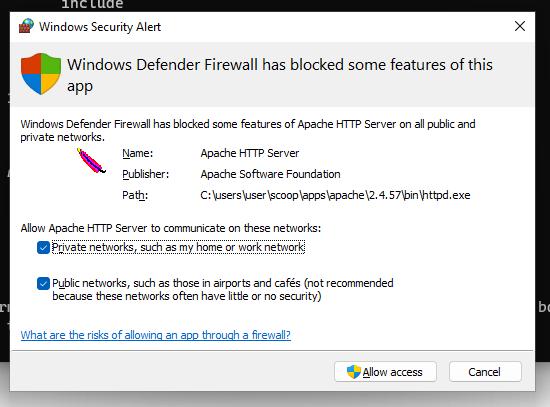
Now either close the terminal or use CTRL^C to tell httpd to quit.
Make sure both boxes are checked then click Allow access.
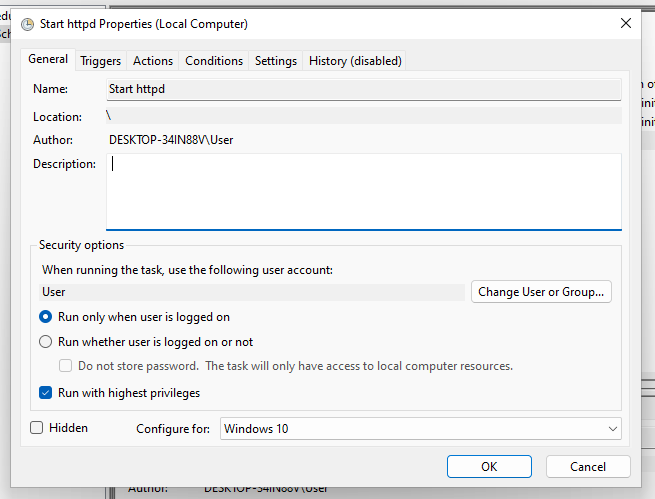
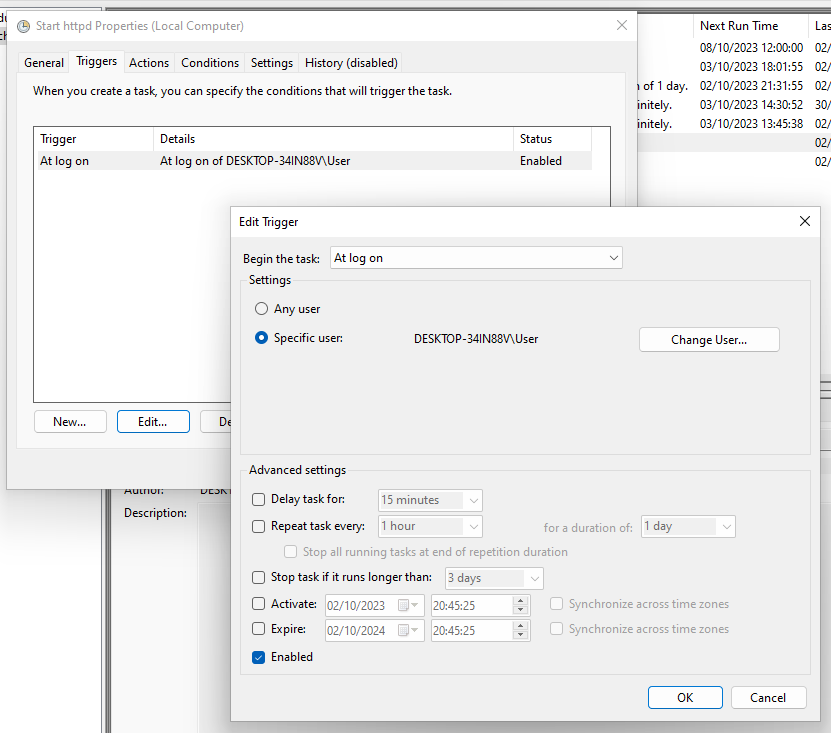
Now we’re going to create a scheduled task to start the server whenever the user logs in. Running it in this way instead of as a service allows interaction with the desktop and also use the equivalent of the Run as admin… option from the context menu without the UAC box popping up.
Open up task scheduler and use the “Create Task…” action from the menu on the right
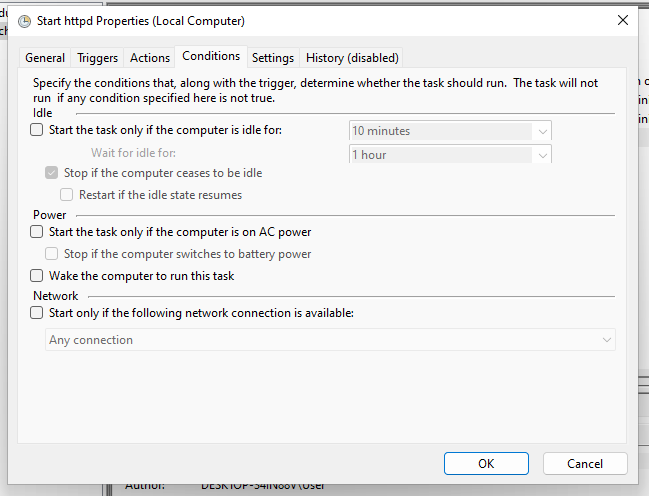
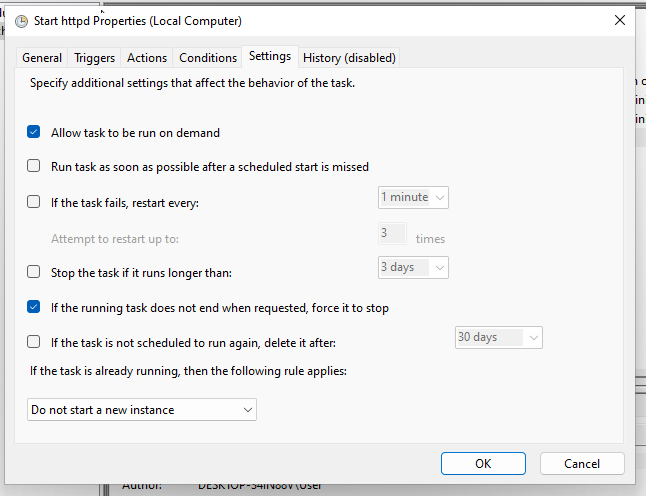
Configure the task as shown in these images
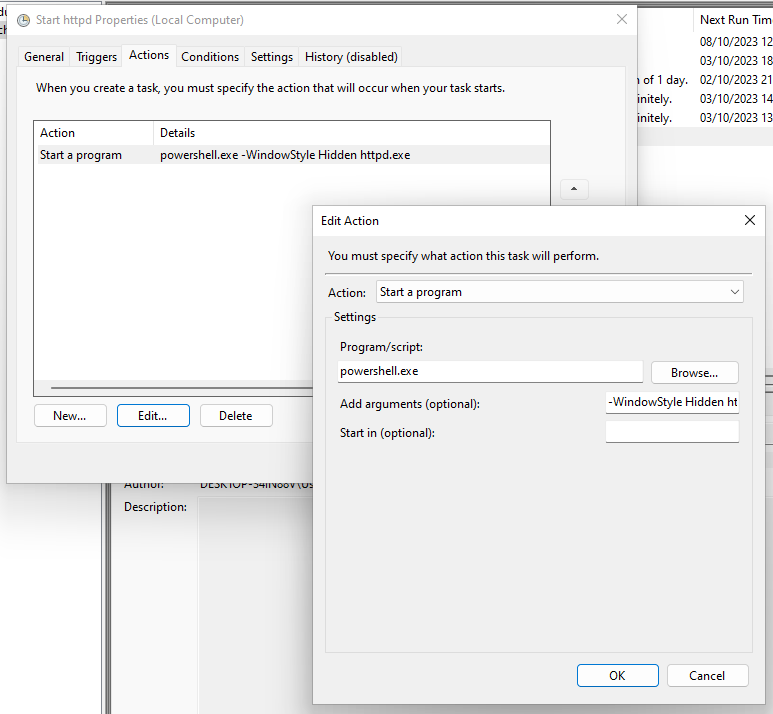
Here “Program/script” is
powershell.exe and “Add arguments” is -WindowStyle Hidden httpd.exe.
Configuring The Server
Create a new file for the Apache PHP module config at C:\Users\[username]\scoop\apps\apache\current\conf\php.conf with the following contents
LoadModule php_module "C:\Users\[username]\scoop\apps\php\current\php8apache2_4.dll"
AddHandler application/x-httpd-php .php
PHPIniDir "C:\Users\[username]\scoop\apps\php\current"
Edit the main config file C:\Users\[username]\scoop\apps\apache\current\conf\httpd.conf to include the one we just created, by adding this line to the bottom of the file
Include conf/php.conf
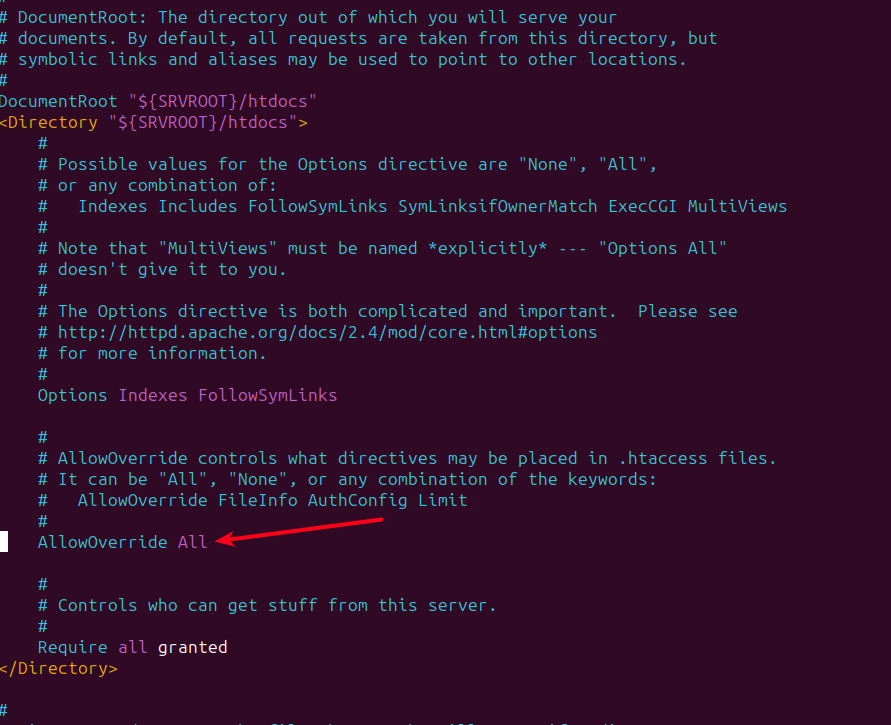
Also find the line AllowOverride None in the <Directory "${SRVROOT}/htdocs"> block, for me this was around line number 272. Basically it should look like this
Create a new file to configure PHP at C:\Users\[username]\scoop\apps\php\current\php.ini with the following contents
[PHP]
;;;;;;;;;;;;;;;;;;;;
; Language Options ;
;;;;;;;;;;;;;;;;;;;;
engine = On
short_open_tag = Off
output_buffering = 4096

zend.exception_ignore_args = Off
zend.exception_string_param_max_len = 1000000

;;;;;;;;;;;;;;;;;;;
; Resource Limits ;
;;;;;;;;;;;;;;;;;;;
max_execution_time = 0
max_input_time = -1
memory_limit = -1

;;;;;;;;;;;;;;;;;;;;;;;;;;;;;;
; Error handling and logging ;
;;;;;;;;;;;;;;;;;;;;;;;;;;;;;;
error_reporting = E_ALL
display_errors = Off
display_startup_errors = On
html_errors = Off
log_errors = On
error_log = php_errors.log

;;;;;;;;;;;;;;;;;
; Data Handling ;
;;;;;;;;;;;;;;;;;
variables_order = "GPCS"
request_order = "GP"
register_argc_argv = Off
post_max_size = 0

;;;;;;;;;;;;;;;;;;;;;;;;;
; Paths and Directories ;
;;;;;;;;;;;;;;;;;;;;;;;;;
extension_dir = "ext"
enable_dl = Off

;;;;;;;;;;;;;;;;
; File Uploads ;
;;;;;;;;;;;;;;;;
file_uploads = On
upload_max_filesize = 10G
max_file_uploads = 10000

;;;;;;;;;;;;;;;;;;
; Fopen wrappers ;
;;;;;;;;;;;;;;;;;;
allow_url_fopen = On
allow_url_include = Off

;;;;;;;;;;;;;;;;;;;;;;
; Dynamic Extensions ;
;;;;;;;;;;;;;;;;;;;;;;
extension=curl
extension=fileinfo
extension=gd
extension=intl
extension=mbstring
extension=exif
extension=mysqli
extension=odbc
extension=openssl
extension=pdo_mysql
extension=pdo_odbc
extension=pdo_sqlite
extension=shmop
extension=sockets
extension=sodium
extension=sqlite3
extension=zip

zend_extension=opcache

;;;;;;;;;;;;;;;;;;;
; Module Settings ;
;;;;;;;;;;;;;;;;;;;
[Date]
date.timezone = "UTC"

[Phar]
phar.readonly = Off
phar.require_hash = Off

[Session]
session.save_handler = files
session.use_cookies = 1
session.name = PHPSESSID

[Assertion]
zend.assertions = -1
Testing it Out
First make sure the service is running; either reboot the VM, or click the run button from task scheduler.
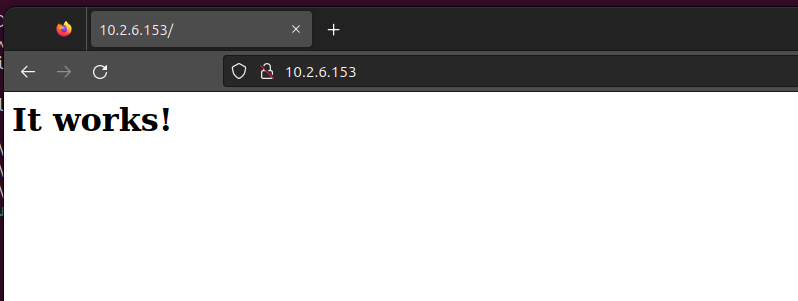
Now open up a web browser on another VM that’s on the same network and go to the IP of the VM, for me this is http://10.2.6.153. If everything is working you should see something like this
Not to make sure PHP works we need to create a simple test file. Apache stores its files in the installation folder by default, C:\Users\[username]\scoop\apps\apache\current\htdocs - I don’t see any reason to change that for now.
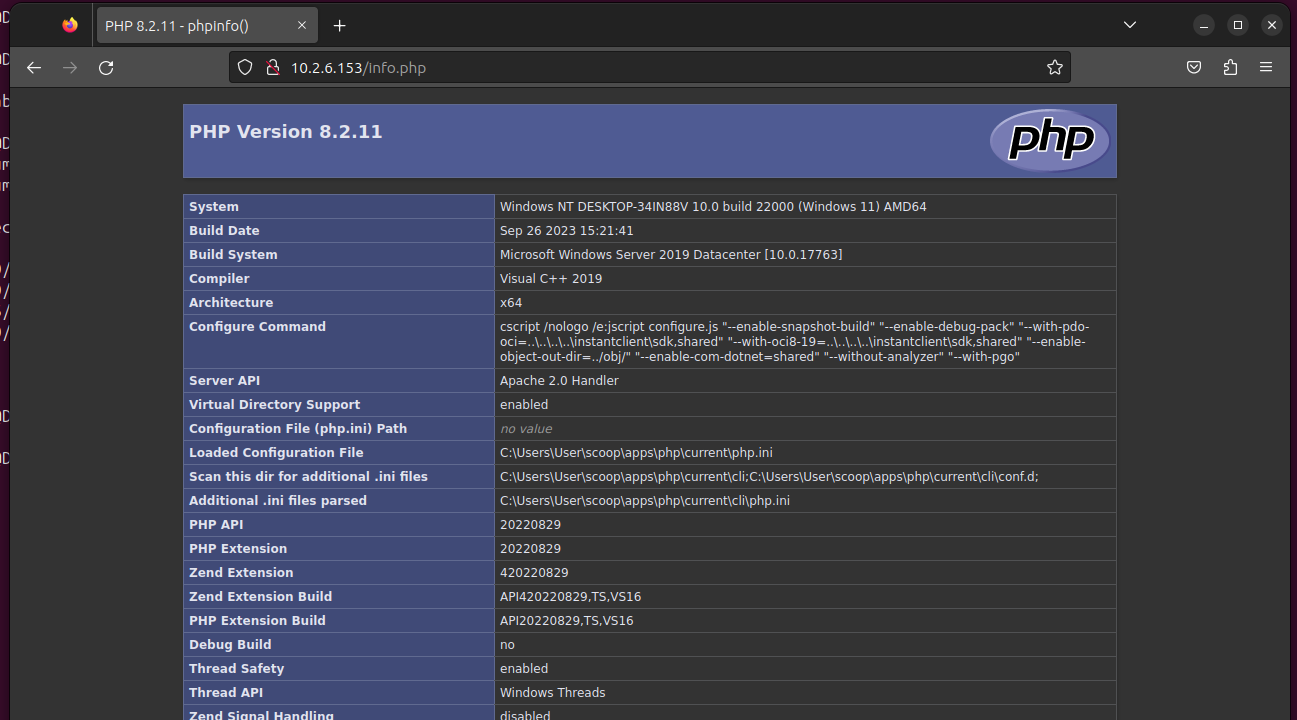
Create a file called info.php in that folder with the following contents
<?php

\phpinfo();
Now visit that file in the browser and you should see something like this
Why Bother?
If you are at all familiar with PHP then you’ll hopefully recognise the power of being able to silently run any command with elevated privileges. If not then keep an eye out for my next post ![]()
Just to repeat that warning too; this makes your VM hopelessly insecure, make 100% sure it’s on an isolated or trusted network and cannot be accessed from outside of that.